Quick APIs with Notion: Streamline Data Integration
Published on August 11, 2023
Simplify your data integration workflow with Quick APIs from CodelessAPI.io. Learn how to effortlessly connect and manage Notion databases using Quick APIs, eliminating the complexities of manual data handling.
Seamless Notion Integration
Quick APIs revolutionize data integration by enabling seamless connectivity with Notion databases. Whether you're managing projects, tasks, or content, Quick APIs provide a swift and code-free solution for automating data management processes.
Getting Started
Follow these steps to set up Quick APIs with Notion:
- Sign Up: If you're new to CodelessAPI.io, sign up for an account. Register here to get started.
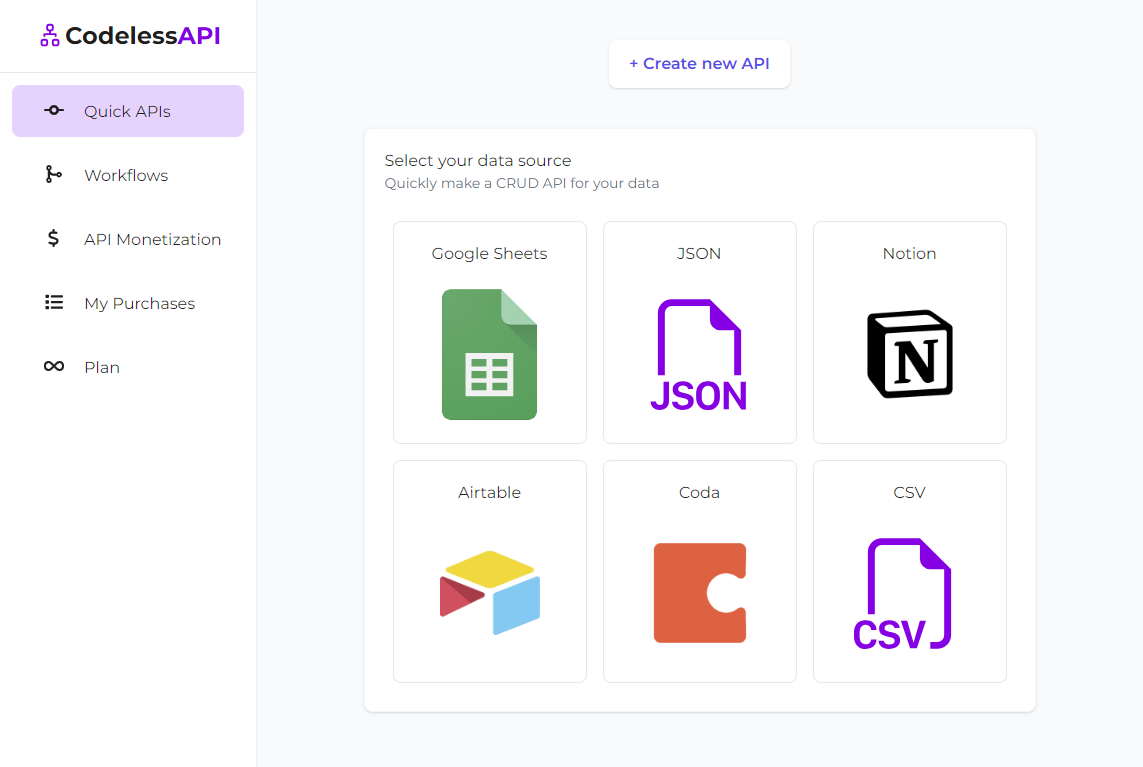
- Access Quick APIs: After logging in, navigate to your dashboard and click on the "Quick APIs" section.
- Create New API: Initiate the process by clicking the "+ Create new API" button.
- Choose Notion Data Source: Select Notion as your data source from the available options.
- Link Notion Account: Click on "Add a new Notion account" to link a new Notion account. Follow the prompts to authorize CodelessAPI.io to access your Notion data. This will open a new tab. After successful authorizaiton, you will be redirected back to the Quick APIs dashboard page.
- Select Notion Database: Once you've given approval to connect your Notion account to CodelessAPI.io, select your account and then click on the specific Notion database you want to integrate.
- Configure API Settings: Provide a name and description for your Quick API. This information will help you identify and manage your APIs effectively.
- Create Your Quick API: Finalize the setup by clicking the "Create" button. Your Quick API will be generated, providing you with endpoints for seamless data interaction.
Automate Data Management
Quick APIs empower you to automate various data management processes:
- Content Updates: Effortlessly update and manage Notion content using CRUD operations provided by Quick APIs.
- Task Tracking: Streamline task management by integrating Notion databases with your task tracking applications.
- Real-time Analytics: Enable real-time analytics by connecting Notion data with your analytical tools.
Supported Operations
Quick APIs provide a comprehensive set of operations for Notion integration:
- GET Calls: Retrieve data from Notion databases using GET requests to the generated API endpoints.
- POST Calls: Insert data into Notion databases with POST requests, enabling efficient data entry.
- DELETE Calls: Delete records from Notion databases using DELETE requests, simplifying data cleanup.
- PUT/PATCH Calls: Update data in Notion databases with PUT or PATCH requests, ensuring accurate data maintenance.
Configure Operations
Customize your Quick API workflow to match your unique requirements:
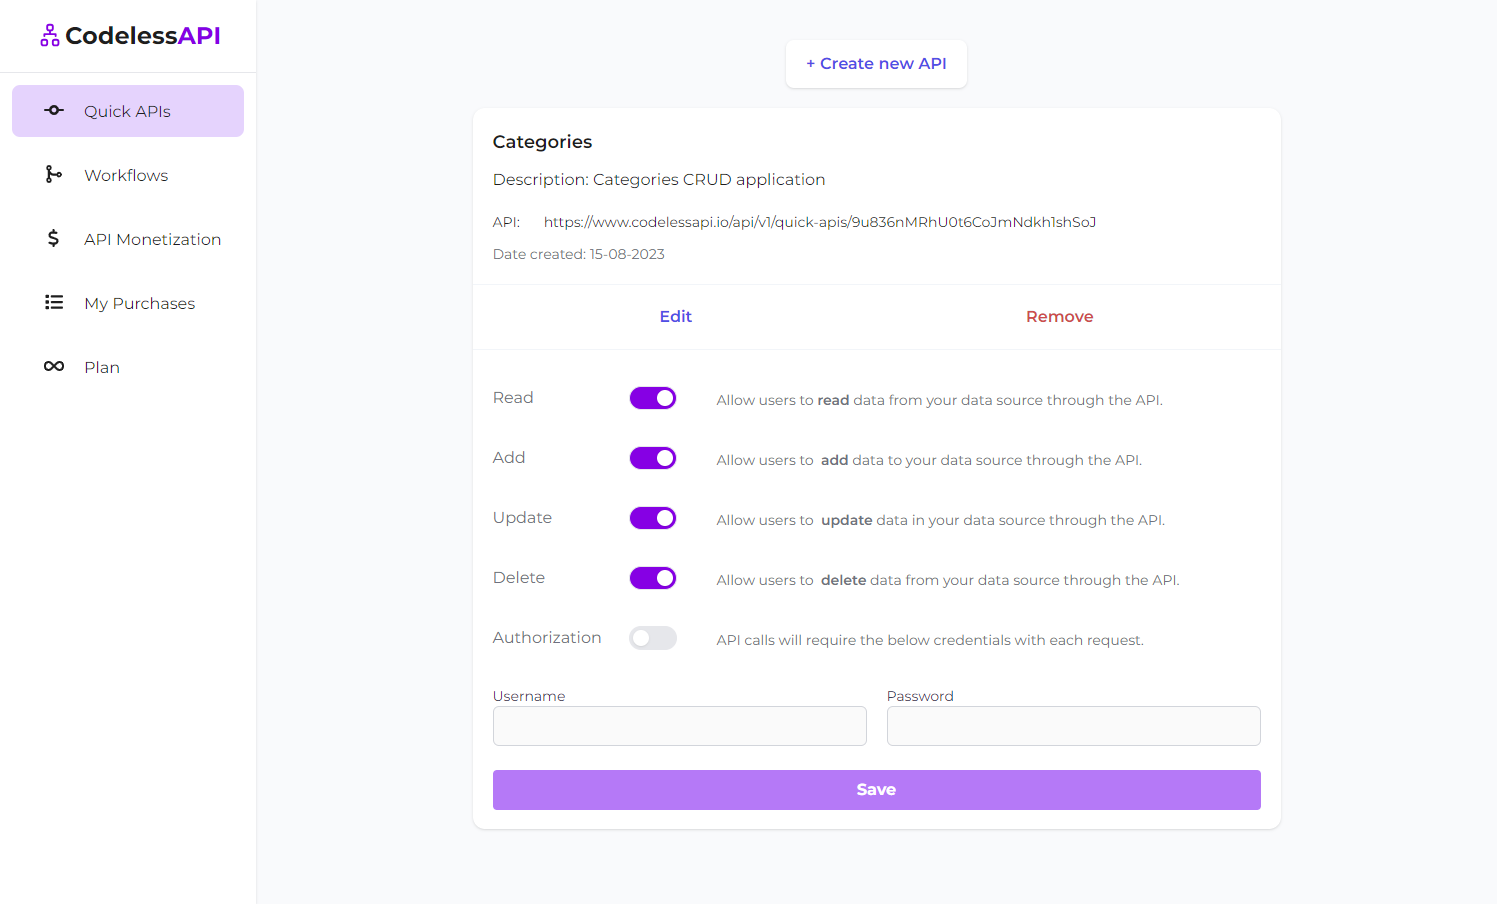
- Access Settings: Navigate to the Quick APIs dashboard page.
- Method Configuration: Enable or disable specific API methods based on your needs. Fine-tune Read, Add, Update, or Delete methods as required.
- Save Preferences: Apply your selected method settings instantly by clicking "Save".
Examples: Performing CRUD Operations
Let's walk through a real-world scenario to showcase the power of Quick APIs with Notion.
Imagine you have a Notion table with tasks like this:
[
  {
    "Priority": "Low",
    "Done": true,
    "Task": "Read a book"
  },
  {
    "Priority": "High",
    "Done": false,
    "Task": "Walk the dog"
  },
  {
    "Priority": "Medium",
    "Done": true,
    "Task": "Buy groceries"
  }
]
Here's how you can seamlessly interact with this data using Quick APIs:
Step 1: Connecting to Your Notion Database
Start by connecting your Notion account to CodelessAPI. Select the "Todo list" database in Notion. This establishes a direct link between your Notion data and Quick APIs.
Step 2: Retrieving Data with GET Request
Use a GET request through Postman or your preferred API client. This returns the data from your Notion table in JSON format. The response will look similar to the table structure above.
Step 3: Adding New Entries with POST Request
[
  {
    "Priority": "Highest",
    "Done": false,
    "Task": "Call Mom"
  }
]
To add a new task, make a POST request and provide the payload: This effortlessly adds an entry to your Notion table. Note you can add multiple rows by adding multiple entries to your payload. This will cause each row to be inserted one by one. i.e.
[
  {
    "Priority": "Highest",
    "Done": false,
    "Task": "Call Mom"
  },
  {
    "Priority": "Highest",
    "Done": false,
    "Task": "Call Dad"
  }
]
Implementation Examples
For detailed code examples and implementation details, please refer to our previous blog post on Introducing Quick APIs.
Unlock the Possibilities
Quick APIs with Notion open the door to a world of possibilities for efficient data integration and management. Whether you're a developer, content creator, or business analyst, Quick APIs empower you to harness the power of Notion databases without the need for complex coding.
Embark on your Quick APIs journey today and experience the transformation of your data handling. Should you have any questions or feedback, feel free to contact us at hello@codelessapi.io. Our team is dedicated to enhancing your data integration experience.