Copy data from Coda to Airtable with CodelessAPI.io
Published on October 10, 2023
Introduction
Data copying is essential for maintaining data consistency and efficiency between different platforms. With CodelessAPI.io, you can easily copy data from Coda to Airtable without writing any code. This blog post will walk you through the step-by-step process of using CodelessAPI.io to achieve seamless data copying from Coda to Airtable, allowing you to manage your data efficiently and create dynamic APIs with ease.
Copying Data Made Easy
Follow these simple steps to set up data copying from Coda to Airtable using CodelessAPI.io:
Step 1: Sign Up and Create a New API
- Sign up for CodelessAPI.io: If you don't have an account, sign up for a free account on CodelessAPI.io. You can create an account by clicking here.
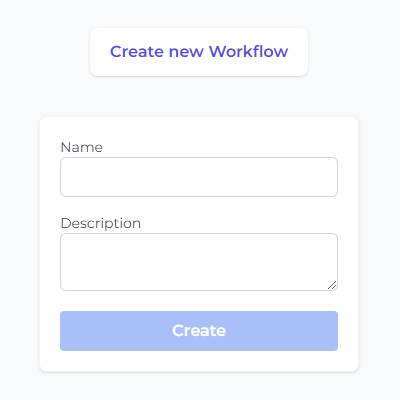
- Create a new API: Once you're signed in, access your dashboard and click on the "+ Create new Workflow" button. Give your API a descriptive name and add a relevant description to easily identify its purpose. After creating the API, you'll be redirected to the API builder page.
Step 2: Connect Coda as the Read Source
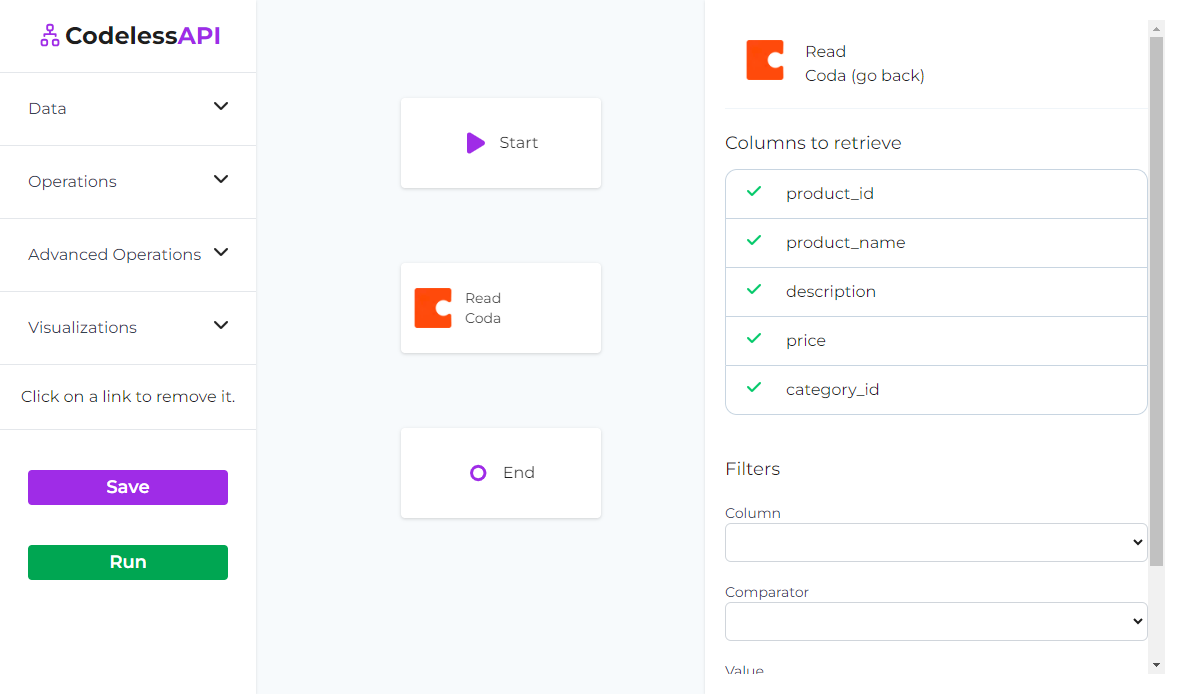
- Select Coda as the data source: Go to the "Data" section on the left sidebar, expand the "Read" section, and choose "Coda" as the read source for your data copying.
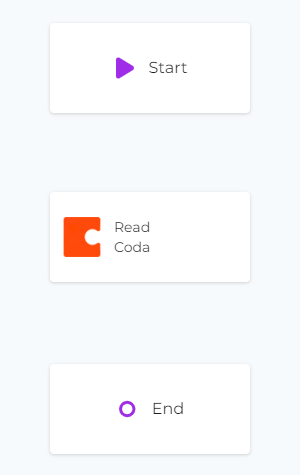
- Add the Coda module to the canvas: Drag and drop the "Coda" module onto the canvas. This module will be the starting point to read data from Coda.
Step 3: Configure the Coda Data Source
- Authorize CodelessAPI.io with Coda: Click on the Coda module on the canvas and select "Configure" from the options. In the configuration panel, click on the "New Coda Account" button and paste your Coda API token. Optionally, provide a name and description for the account. For integration steps on how to obtain your Coda token, please refer to the guide on how to query Coda.
- Select Coda document and table: Once authorized, choose the specific Coda document and table from which you want to read data. Further select the columns you'd like to read from.
Step 4: Connect Airtable as the Create Source
- Select Airtable as the data destination: In the "Data" section on the left sidebar, expand the "Create" option, and choose "Airtable" as the create source for your data copying.
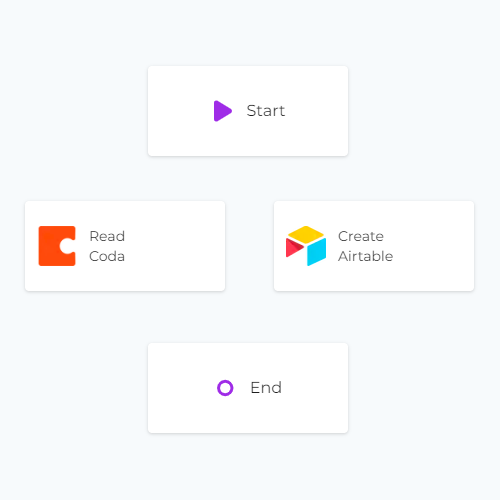
- Add the Airtable module to the canvas: Drag and drop the "Airtable" module onto the canvas. This module will be where the data is copied to.
Step 5: Link the Modules
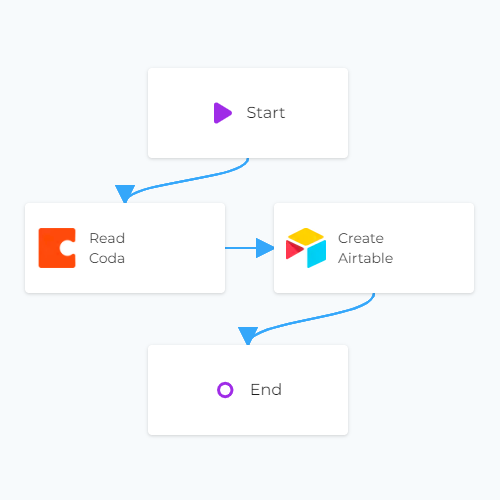
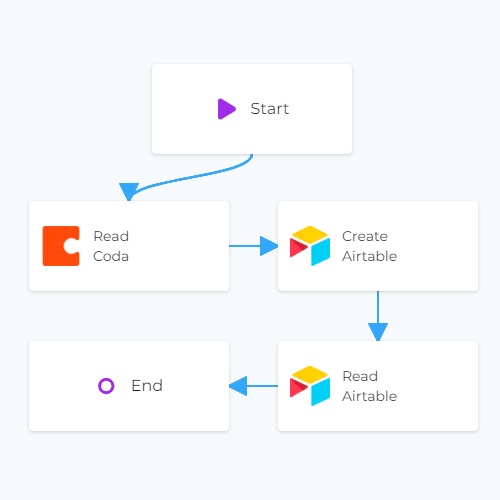
To copy data from Coda to Airtable, make sure to link the modules together in the desired sequence. Link the "Start" module to the "Coda" module, then the "Coda" module to the "Airtable" module. This establishes a data flow from Coda to Airtable. Finally, link the "Airtable" module to the "End" module. You can do this by clicking each module, then clicking "Link", and then clicking the module you want to link it to.
Step 6: Mapping Data in Airtable
- Authorize CodelessAPI.io with Airtable: Click on the Airtable module on the canvas and select "Configure" from the options. In the configuration panel, click on the "New Airtable Account" button. Follow the instructions to authorize CodelessAPI.io and grant access to your Airtable data securely.
- Select Airtable base and table: Once authorized, select the Airtable base and table where you want to add the data read from Coda.
- Map the fields in Airtable with the data read from Coda: Use the "map" option to dynamically add data by selecting the corresponding fields from the dropdown.

- View the data: If you'd like to view the data after it's been copied, add a "Read" module for Airtable after the "Create" module. Configure the module to select from the same table you inserted data into and choose the columns you wish to retrieve. You'll then be able to see the new data after copying.
Step 7: Testing and Deploying Your API
- Test your API: Click the "Run" button to trigger the built-in run of the API. This will highlight any potential issues and validate your API endpoint to verify the API response.
- Deploy and utilize your API: With your newly created API, you can access your API endpoint and start copying data between Coda and Airtable seamlessly. Use your API by clicking on the "Start" module and then selecting the "Configuration" option. Copy the API link provided.
Conclusion
CodelessAPI.io simplifies data copying from Coda to Airtable, making it accessible even for non-technical users. Its intuitive interface and integration capabilities empower you to create dynamic APIs without the need for coding knowledge. Whether you're a business analyst, developer, or non-technical user, CodelessAPI.io streamlines your workflow and ensures data consistency across platforms.
Start data copying today by trying out CodelessAPI.io. For any questions or feedback, feel free to reach out to hello@codelessapi.io. Our team is always ready to assist you in simplifying your data management processes.
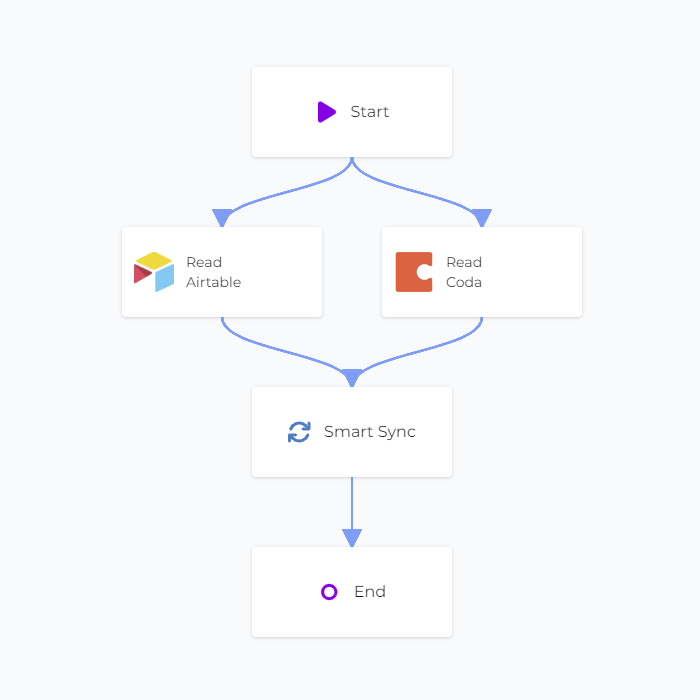 Smart Sync with Airtable and Coda
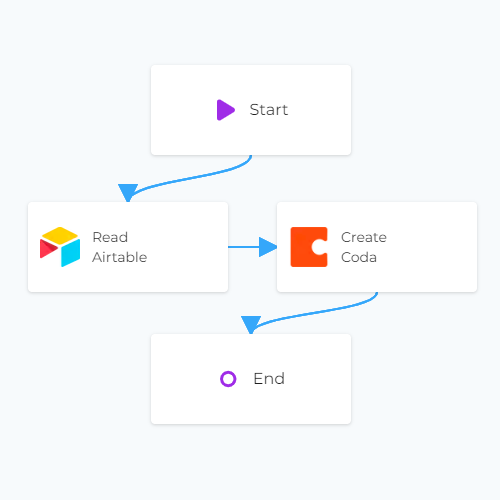 Copy data from Airtable to Coda
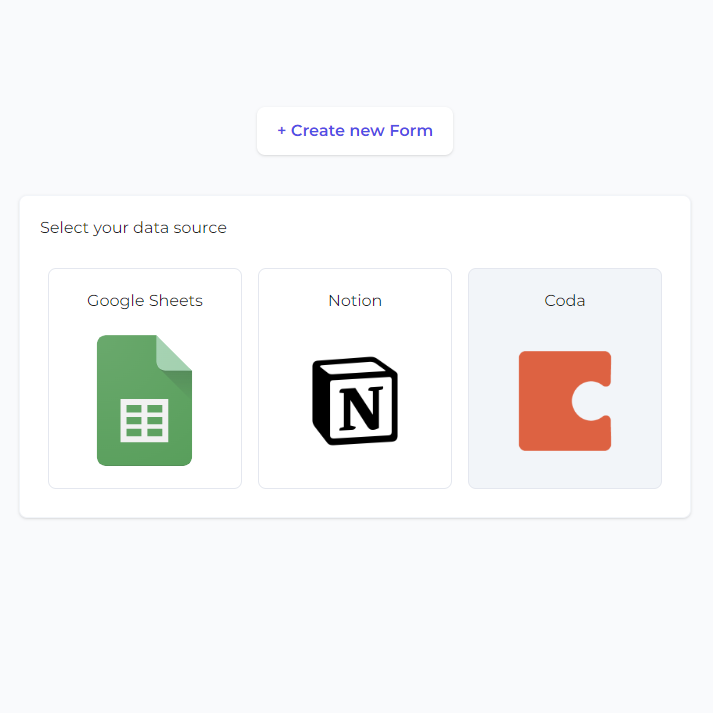 Coda Forms