Build Custom Logic with CodelessAPI's Code Module
Published on April 19, 2024
Introduction
CodelessAPI empowers you to build powerful workflows and APIs without writing code. However, sometimes you might need custom logic to handle specific data manipulations or calculations. Introducing the new Code module, which allows you to inject JavaScript code directly into your workflows, unlocking endless possibilities for customization.
Key Features
- JavaScript Integration: Write and execute custom JavaScript code within your workflows, allowing for fine-grained control over data processing and logic.
- Data Access: Seamlessly access and manipulate data from connected modules using intuitive syntax. For instance, access Google Sheets data with `GoogleSheets.map(entry => ...)` and Notion data with `Notion.map(entry => ...)`.
- Output Control: Define custom output columns and return data using the
RETRIEVEfunction, ensuring compatibility with subsequent modules in your workflow. Please note, the returned data must be an array of objects. For example:RETRIEVE([{ name: "user1", id: 1 }, { name: "user2", id: 2}]) - Expandable Interface: The Code module provides an &qupt;Expand&qupt; button to enlarge the coding area, offering a comfortable environment for writing and editing your JavaScript code.
Using the Code module with Google Sheets and Notion
For the purposes of this tutorial, we are focusing on connecting Google Sheets and Notion to the Code module. Feel free to use other data sources or connect other modules to the Code module.
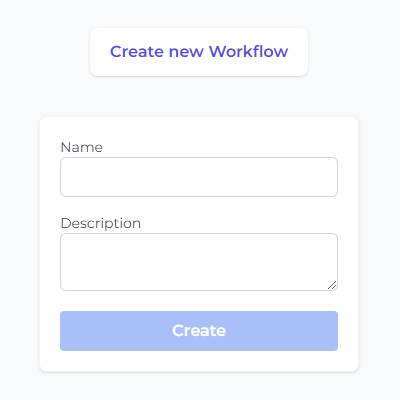
Step 1: Create a New Workflow
You'll need to create a new workflow to use the Code module.
- Access CodelessAPI.io: Log in to your CodelessAPI.io account.
- Navigate to Workflow: Locate and click on the "Create new Workflow" button in the Workflow section of your CodelessAPI.io dashboard.
- Create Your Workflow: Provide a name and description for your workflow and then click "Create". You'll be taken to the Workflow builder page.
Step 2: Connect Google Sheets
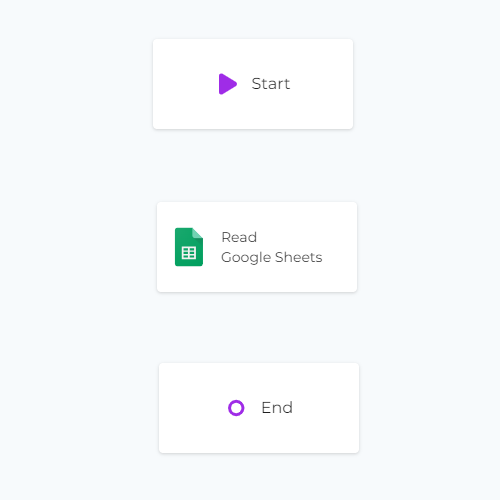
- Select Google Sheets as the data source: In the "Data" section of the left sidebar, expand the "Read" options, and choose "Google Sheets" as one of the data sources to read from.
- Add the Google Sheets module to the canvas: Drag and drop the "Google Sheets" module onto the canvas. This module will be your starting point for reading data from Google Sheets.
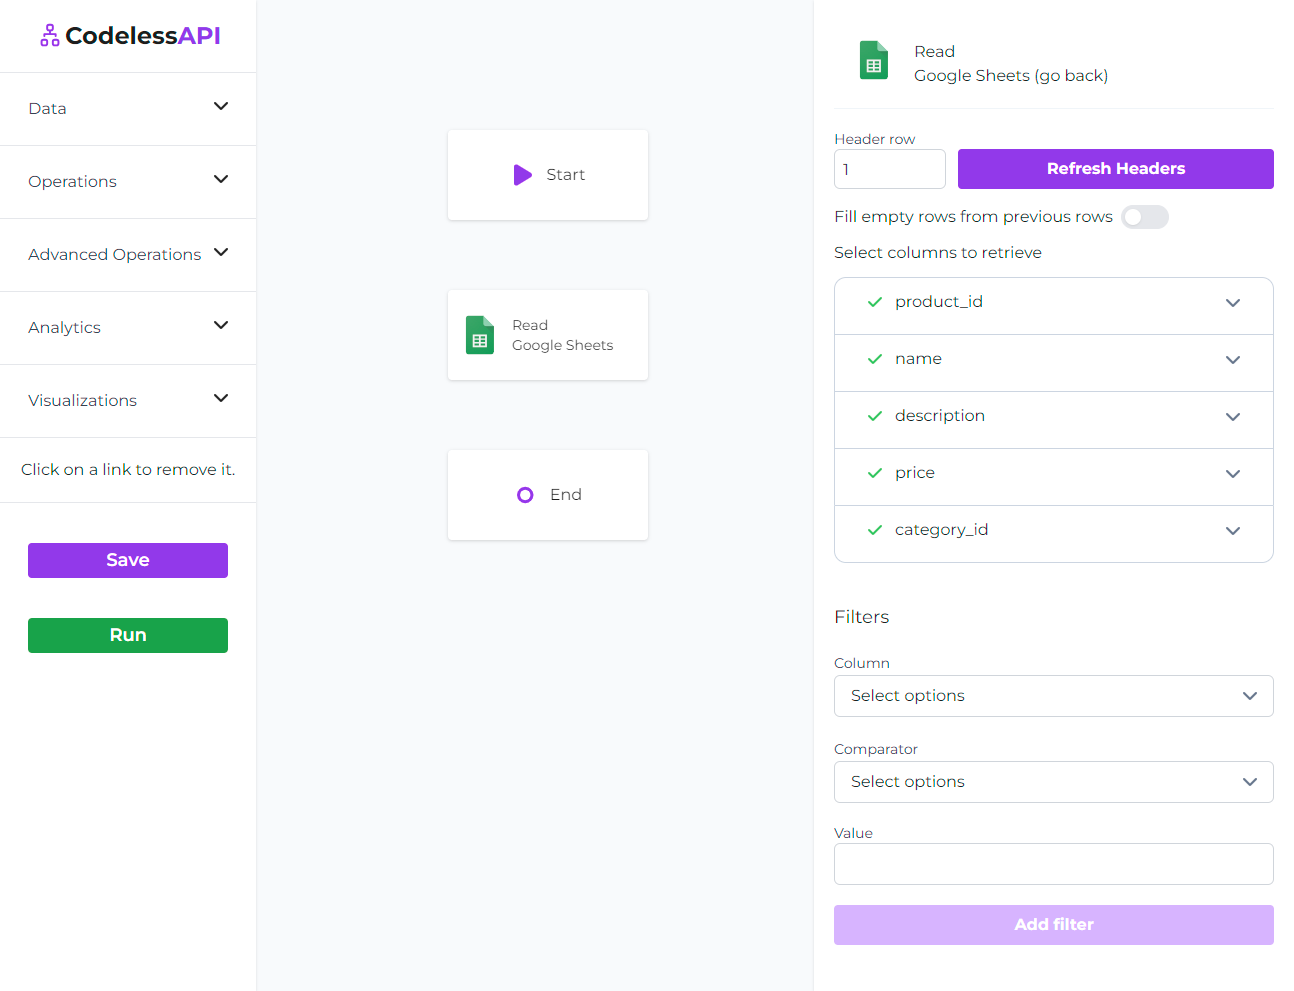
Step 3: Configure the Google Sheets Data Source
- Authorize CodelessAPI with Google Sheets: Click on the Google Sheets module within the canvas and select "Configure". Follow the prompts to authorize CodelessAPI and grant access to your Google Sheets data.
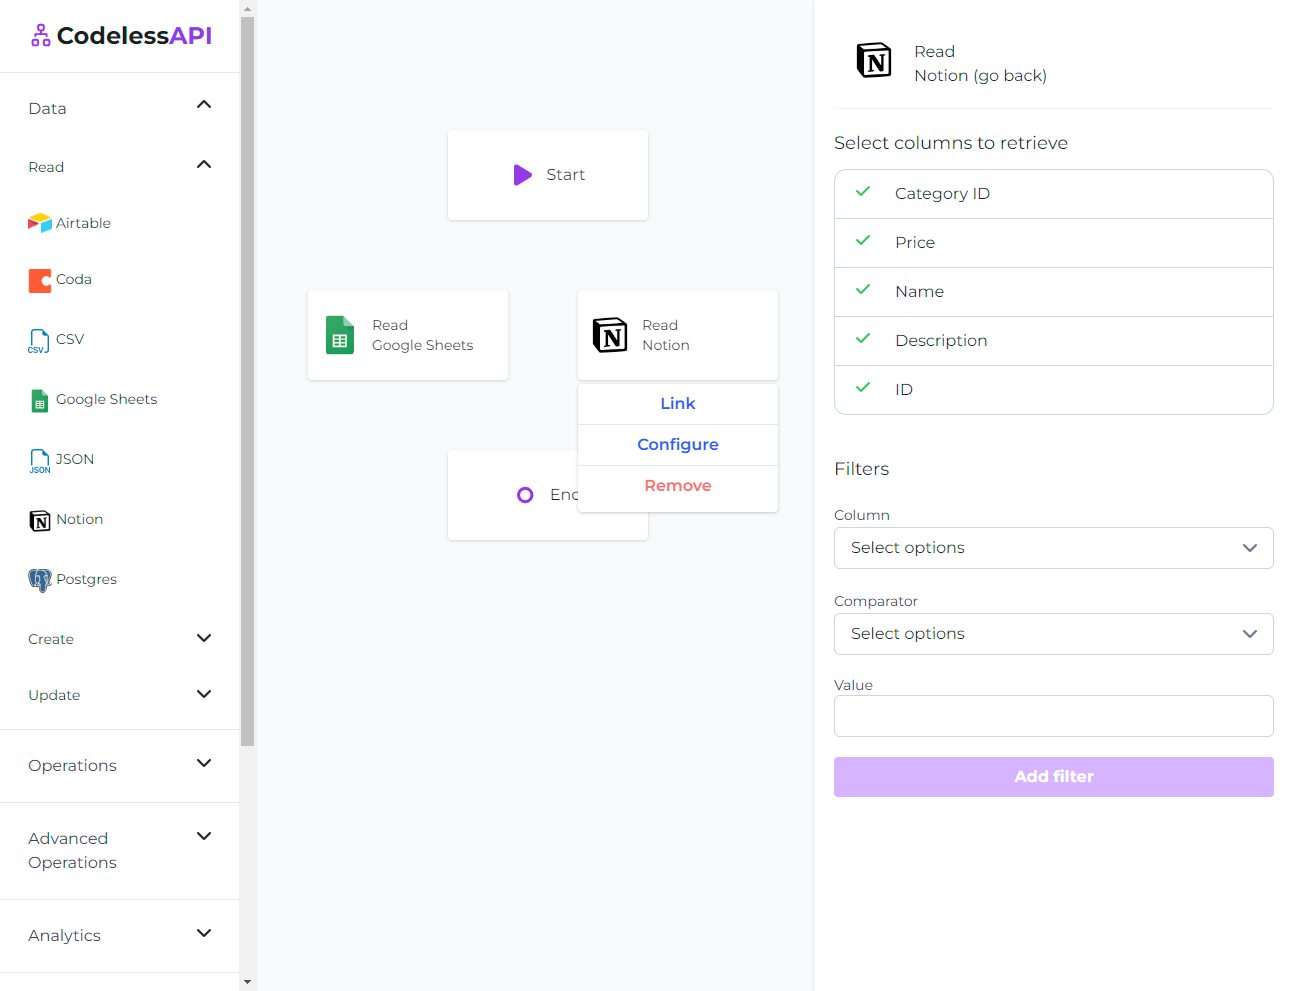
- Select the spreadsheet and sheet: After authorization, choose the specific Google Sheets spreadsheet and sheet that you want to feed into the Code module. Select the columns you wish to retrieve.
Step 4: Connect Notion
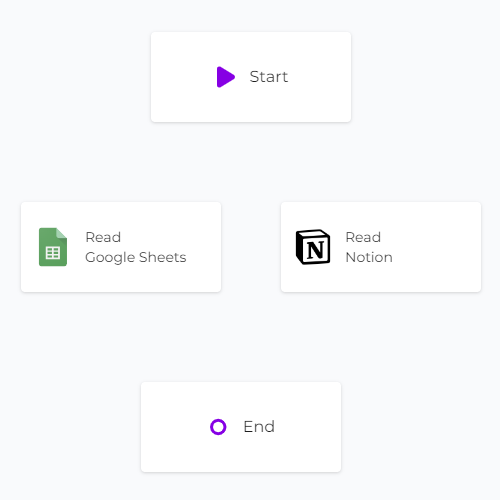
- Choose Notion as the other data source: Go to the "Data" section, expand the "Read" options, and select "Notion".
- Add the Notion module to the canvas: Drag and drop the "Notion" module onto the canvas. We will be able to access this Notion data within our Code module later on.
Step 5: Configure the Notion Data Source
- Authorize CodelessAPI with Notion: Click on the Notion module within the canvas and select "Add Notion Account". This will open a new window where you can choose which Notion databases you want CodelessAPI to access. Follow the prompts to authorize the relevant databases.
- Select the database and properties: After authorization, return to the builder page. Click on the Notion module and choose "Configure". Select the specific Notion account and database you want to read data from. Choose the properties you wish to read.
Step 6: Add the Code Module
- Add Code module: Expand the " Operations" section, and drag and drop the "Code" module onto the canvas. This module runs JavaScript code and uses the
RETRIEVEfunction to output an list of objects. For example:RETRIEVE([{ name: "user1", id: 1 }, { name: "user2", id: 2}])
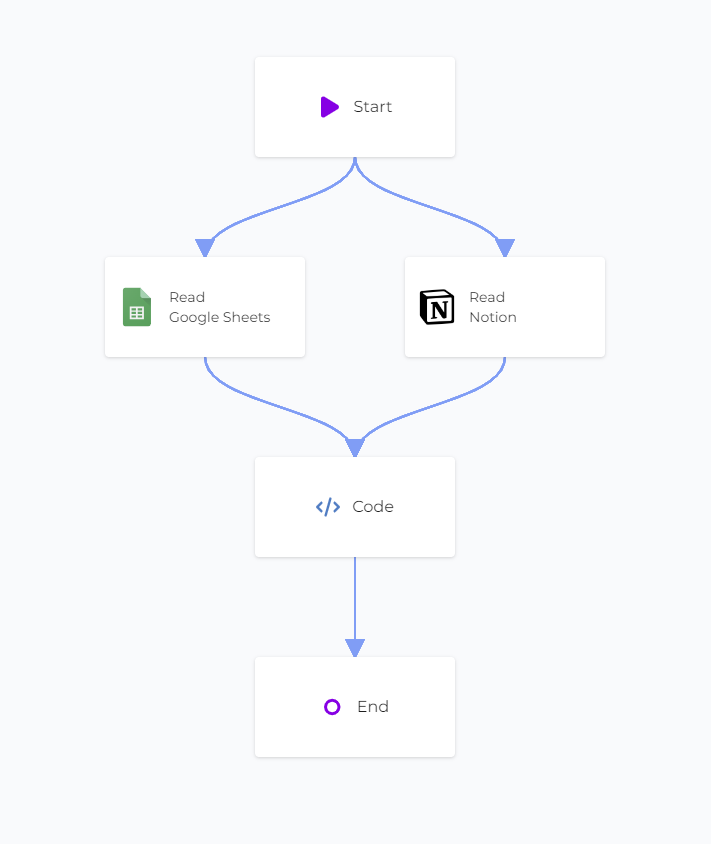
Step 7: Link the Modules
Create links to represent the data flow between Google Sheets, Notion, and the Code module:
- Link Start to Google Sheets: Connect the "Start" module to the "Google Sheets" module by clicking the "Start" module, clicking "Link" then clicking the "Google Sheets" module. You can remove a link by clicking on the link itself.
- Link Start to Notion: Similar to above, connect the "Start" module to the "Notion" module.
- Link Google Sheets to Code: Connect the "Google Sheets" module to the "Code" module.
- Link Notion to Code: Connect the "Notion" module to the "Code" module.
- Link Code to End: Connect the "Code" module to the "End" module.
Step 8: Configure the Code Module
Configure the Code module to work with the data from Google Sheets and Notion.
- Open the Code Editor: Click the Code module and click on Configure. This will open the configuration panel on the right hande side. In the configuration panel, you can write your code within the text area, or click expand just above it to get a full screen view of your text editor.
- Manipulate incoming data sources: You'll be able to reference the incoming connections to the Code module by using the variable names defined in the "Input data" in the configuration panel.
- Return an array of objects: Make sure to return a list of objects. You can do this by passing it into the
RETRIEVEfunction at the end of your code. - Define output columns: Make sure to define the output columns from your code module. This let's you select the columns in subsequent modules you add on after the Code module. I.e. if you connect the Code module to a Filter module, you'll be able to select which columns to filter.
Here's an example code snippet that finds matching entries between Google Sheets and Notion based on a "name" column and returns them as a JSON array:
// Access data from Google Sheets and Notion
const googleSheetsData = GoogleSheets;
const notionData = Notion;

// Find matching entries
const matchingEntries = googleSheetsData.filter(googleEntry =>
  notionData.some(notionEntry => googleEntry.name === notionEntry.name)
);

// Return matching entries using RETRIEVE
RETRIEVE(matchingEntries); 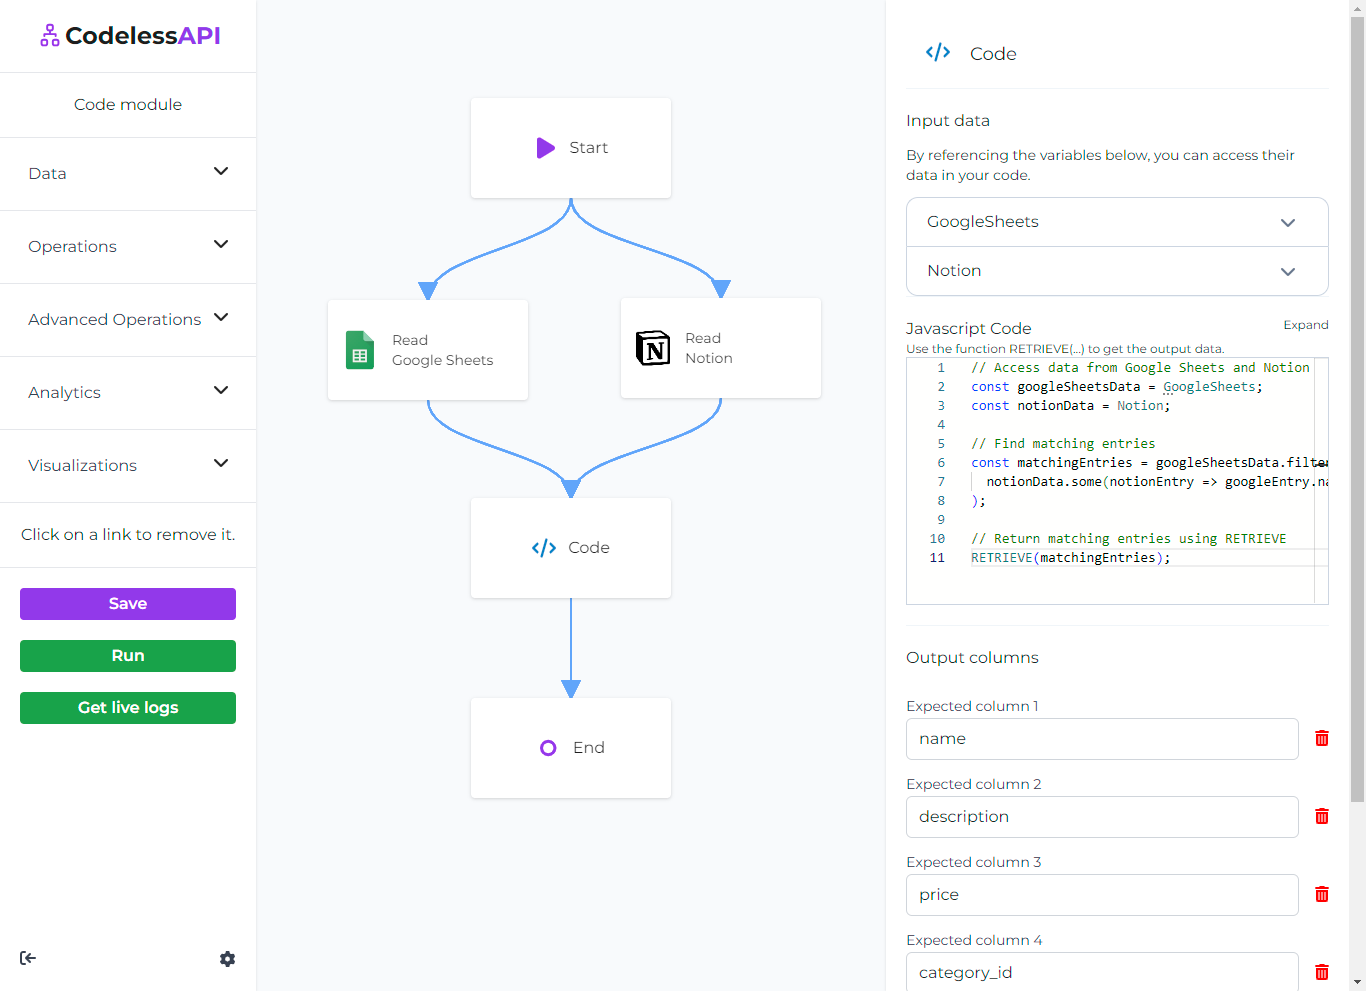
Step 9: Test and Deploy Your Workflow
- Test your Workflow: Initiate a test run of the workflow using the "Run" button at the bottom of the left panel. This helps identify potential issues and validates the workflows functionality. The Code module will process the data according to your custom code, and the output will be displayed, showcasing the matching entries from Google Sheets and Notion.
- Deploy and use your API: After configuring the workflow, you can use the generated API endpoint for your workflow to be used as an API hook. To use the API, click on the "Start" module and select "Configuration" to obtain the API link.
Conclusion
The Code module enhances CodelessAPI's flexibility, allowing you to incorporate custom logic and data manipulation into your workflows. Whether you need to perform complex calculations, integrate with external APIs using the "API call" module, or implement unique data processing routines, the Code module empowers you to achieve your automation goals without limitations.
Start building your workflows today by exploring the features of CodelessAPI. For any questions or feedback, please reach out to hello@codelessapi.io. Our team is always happy to help!
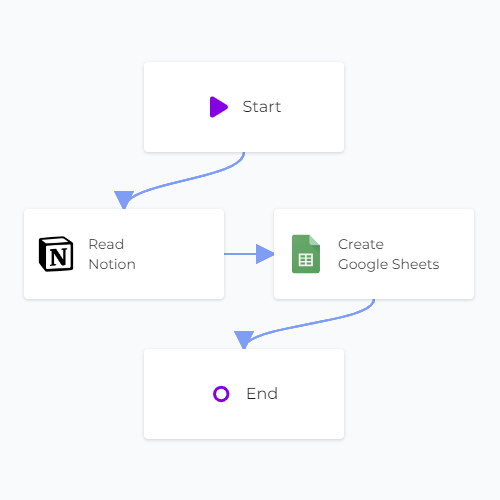 Copy data from Notion to Google Sheets
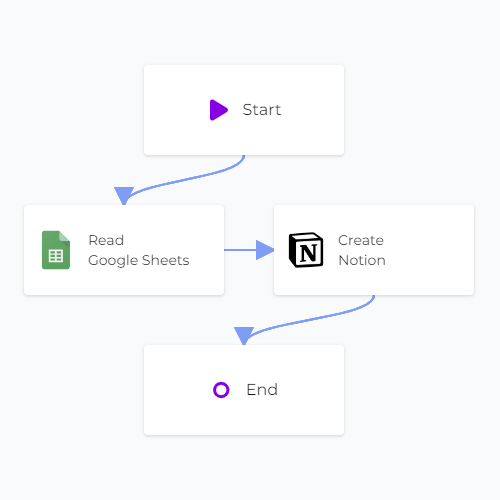 Copy data from Google Sheets to Notion
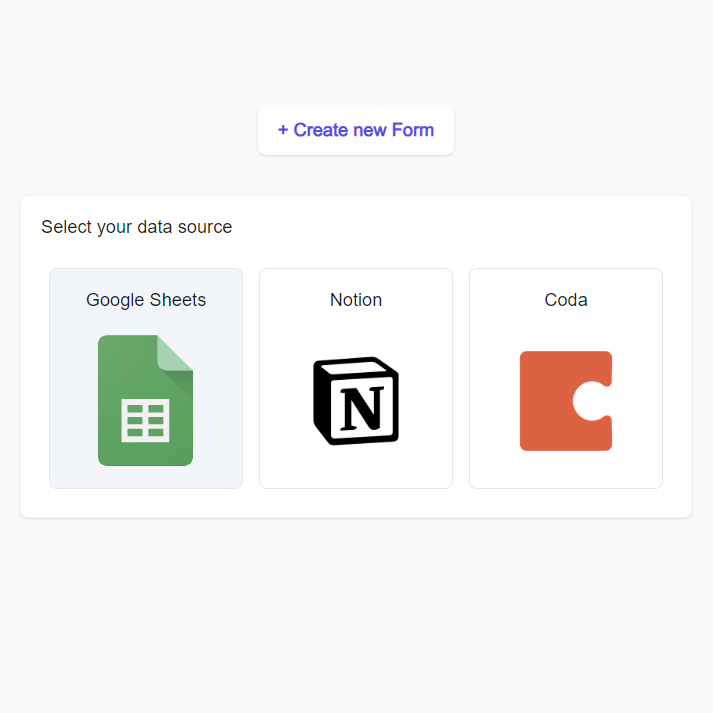 Google Sheets Forms