How to Use SendGrid with Airtable for Email Automation
Published on October 23, 2023
Email automation is a powerful way to streamline your communication and connect with your audience more effectively. By integrating SendGrid with Airtable, you unlock a world of possibilities for your email campaigns.
This integration allows you to tap into the rich data stored in your Airtable databases and use it to create personalized and data-driven email communications. Whether you're sending out newsletters, promotions, updates, or personalized messages, the combination of SendGrid and Airtable provides you with the tools to engage your recipients in a more meaningful way.
Step 1: Sign Up for SendGrid
Before you can begin automating email communications, you'll need a SendGrid account.
- Visit SendGrid: Head over to sendgrid.com in your web browser.
- Sign Up: Look for the sign-up or registration option on the website and click on it.
- Choose a Plan: SendGrid offers various plans to suit your email sending needs. Select the plan that best fits your requirements.
- Complete Registration: Follow the on-screen instructions to complete the registration process, which includes providing basic information and verifying your email address.
Congratulations! You now have a SendGrid account ready to power your email communications. If you want to follow a tutorial on how to set up SendGrid, please follow this post .
Step 2: Obtain Your API Key
After signing up, navigate to your SendGrid dashboard and generate an API key. This key will be used to authenticate your Airtable's interactions with SendGrid. Follow this tutorial to generate your SendGrid API key. Make sure to save the generated API key for later.
Step 3: Set Up Your Airtable Database
You'll need an Airtable database to store the data you want to use for email automation. Follow these steps to set up your Airtable database:
- Visit Airtable: Go to airtable.com and sign in or sign up for an Airtable account.
- Create a Base: In your Airtable workspace, create a new base and give it a name related to your email campaign, such as "Email Contacts".
- Design Your Table: Within the base, create a table with columns that correspond to the data you want to use in your emails, such as "Name", "Email", and "Message".
- Add Data: Populate your table with the relevant data. You can manually add data or import it from a CSV file.
Step 4: Create a New Workflow
You'll need to create a new workflow to automate your email campaign.
- Access CodelessAPI.io: Log in to your CodelessAPI.io account.
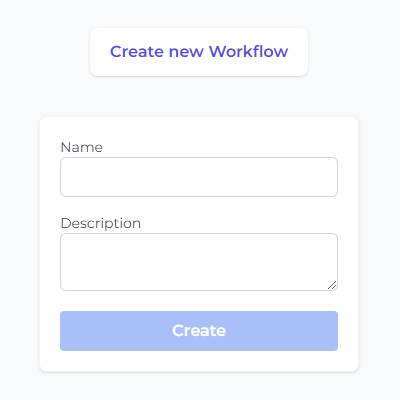
- Navigate to Workflow: Locate and click on the "Create new Workflow" button in the Workflow section of your CodelessAPI.io dashboard.
- Create Your Workflow: Provide a name and description for your workflow and then click "Create". You'll be taken to the Workflow builder page where the magic happens.
Step 5: Connect Airtable to CodelessAPI
Now, let's connect your Airtable data to CodelessAPI. This connection allows you to fetch data directly from your Airtable database to personalize your emails.
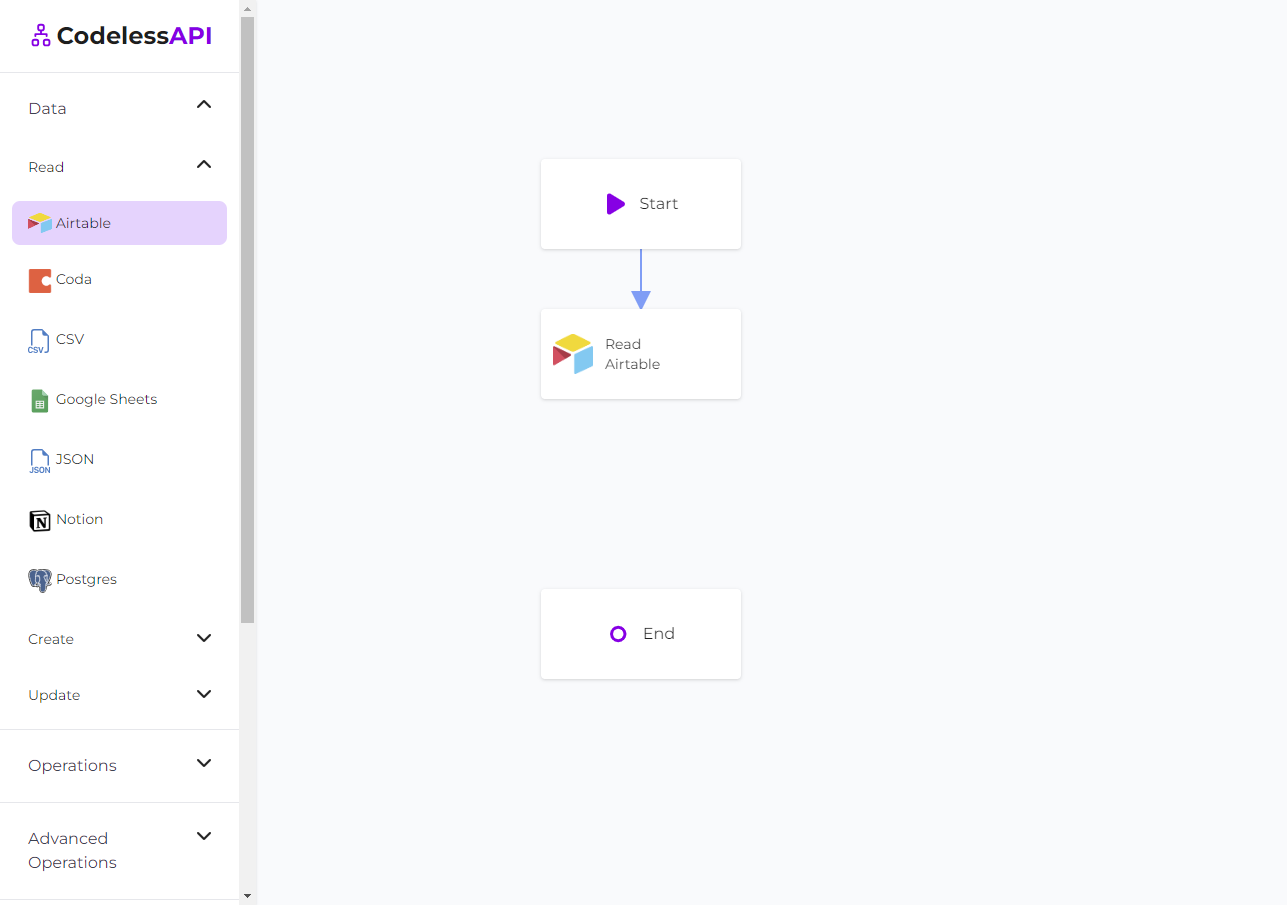
- Drag Airtable Module: In the left sidebar of your workflow builder, expand the "Data" section, then expand the "Read" section and find the Airtable module. Drag it onto your canvas.
- Configure Airtable Module: Click on the Airtable module you've added to your canvas. This is where you'll set up the connection. Click on "New Airtable Account".
- Authenticate Your Airtable Account: Follow the authentication process to connect your Airtable account to CodelessAPI. Once authorized, you can select the Airtable base you want to query. Then chosose the specific table that contains the data you want to send via email with SendGrid. For more detailed integration steps, refer to the guide on how to query Airtable.
- Link the modules To dictate the flow of data, you need to link your modules together. Click the "Start" module and then click "Link". You should see a blue line with an arrow pointing toward your cursor. Move your cursor over to the "Airtable" module and click. You should now see an arrow going from the Start module to the Airtable module.
Step 6: Add the Text Replace Module
Use the "Text Replace" module if you'd like to send personalized emails or would like to use a custom template.
- Drag Test Replace Module: In the left sidebar of your workflow builder, expand the "Operations" section and find the "Text Replace" module. Drag it onto your canvas.
- Link the modules Similar to above, link the "Airtable" module to the "Text Replace" module.
- Configure the Text Replace Module: Click on the Text Replace module you've added to your canvas. Within the "Text body" field is where you can paste your HTML template or your personalized message.
- Replace words for customizability Use the "Add new replace condition" option to replace words from your body text. By setting the "Replace with" to the "map" option, you can select a field from the Airtable data source. Make sure to click on the "Add replace condition" button after you've added your condition!
For example, the body text "Hi [NAME]" can have the "[NAME]" replaced with data from the Airtable data source. Each row in the data source will generate a new personalized template with all the words replaced based on the "Text Replace" module's configurations.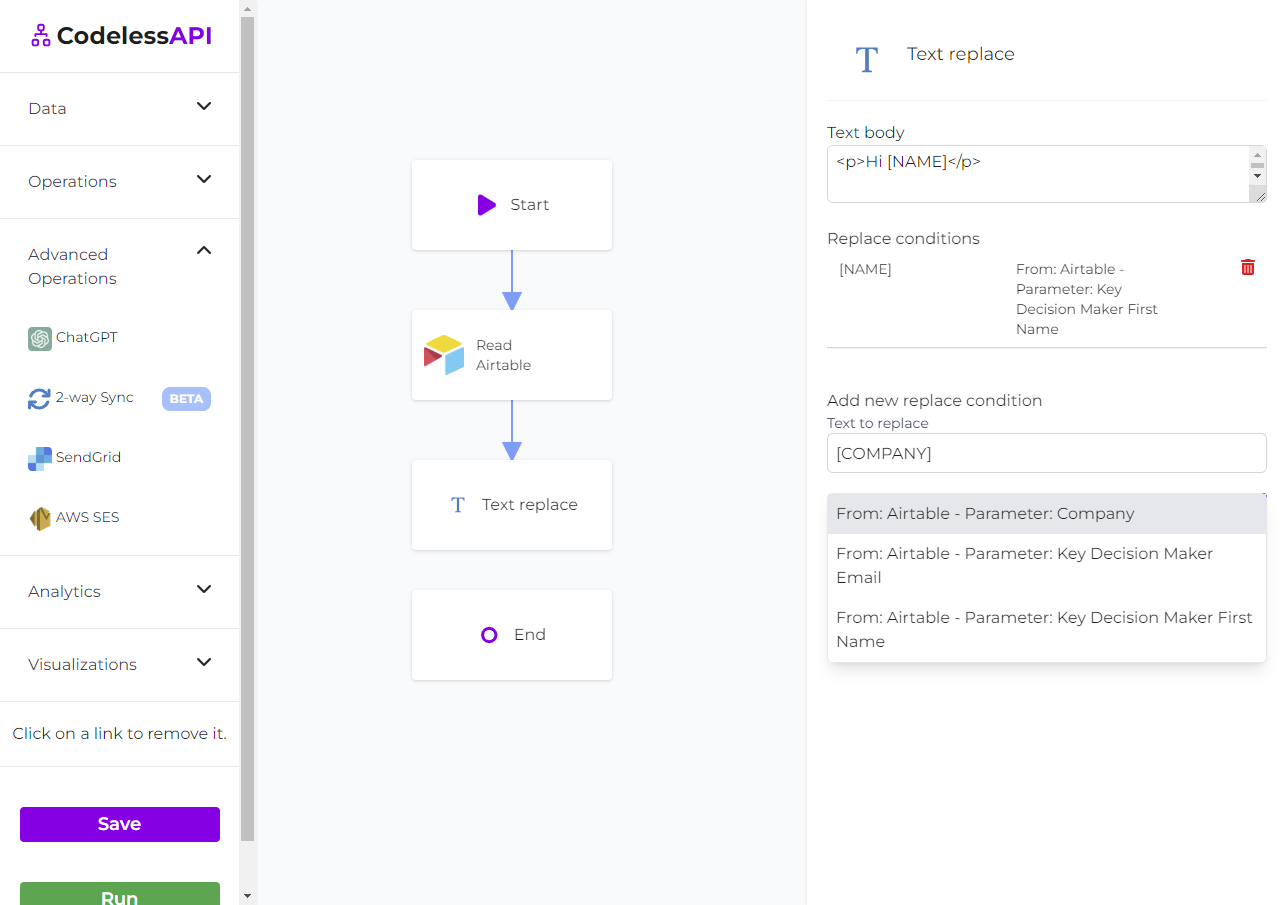
You've now added the ability to generate personalized templates! Link the "Text Replace" module to the "End" module and click run to see the output templates. Optionally add the "ChatGPT" module before the "Text Replace" module, and then feed in both Airtable and the "ChatGPT" module to automate generating personalized emails!
Step 7: Adding the SendGrid Module
Now that you've set up your data source, it's time to add the SendGrid module to your workflow. The SendGrid module will enable you to send emails efficiently and effectively. Follow these steps to add it to your canvas:
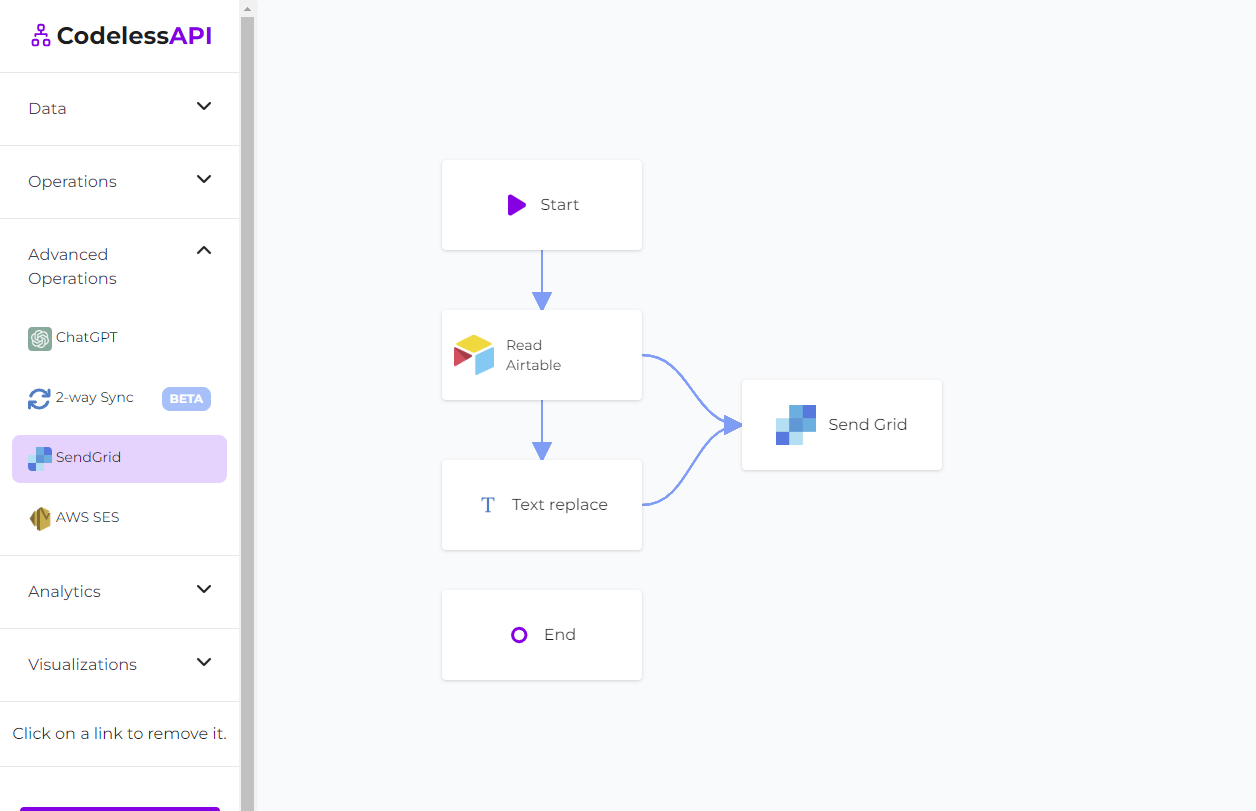
- Access Advanced Operations: In the left sidebar of the workflow builder, find the "Advanced Operations" section and expand it.
- Select SendGrid: Among the advanced options, locate the "SendGrid" module and drag it onto your canvas.
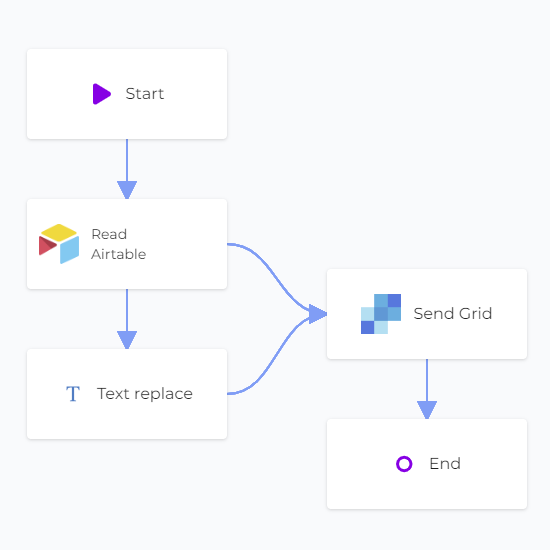
- Link the modules Similar to above, this time link both the "Airtable" module and the "Text Replace" module to the "SendGrid" module.
With the SendGrid module added, you're ready to configure it to connect securely to your SendGrid account.
Step 8: Configuring SendGrid module
To send emails using SendGrid, you need to provide your SendGrid API key, which you generated from step 2.
- Add SendGrid account Click on the SendGrid module on the canvas, and then select "Configure" from the options. In the configuration panel, click on "New SendGrid Account" and paste your SendGrid API key. Provide a name and description for the account. You'll now be able to configure the email settings by clicking on your SendGrid account and then filling out the email configuration fields.
- Set email values The "From email" option is set automatically based on the emails you have verified from your SendGrid account. The rest of the columns can either be set with the "manual" option or the "map" option. The manual option lets you hardcode the entry.
You can now utilize the map option for your columns and map it to relevant columns coming from either the Text Replace module or the Airtable module. This will send an email for every row of data from your Airtable data source.
- Link the modules You can now link the "SendGrid" module to the "End" module. This completes your workflow and ensures that it operates seamlessly.
Step 9: Run the Workflow
Before you finalize your email automation, it's crucial to test your workflow and ensure that emails are sent correctly. Here's how you can run the workflow for validation:
- Use Built-in Run Feature: CodelessAPI.io offers a built-in run feature to validate your API endpoint. Click the "Run" button located at the bottom of the left sidebar to test your workflow. Please use a dummy email in SendGrid for the test.
- Inspect Results: Review the results of your test run. Ensure that emails are being sent correctly and that the data flows as expected.
- Copy API Link: Once you're satisfied with the results, you can either run your workflow manually or copy the API associated with your workflow to trigger it based on an event. Find your Workflow API by clicking on the "Start" module and selecting the "Configuration" option. Copy the provided API link.
Congratulations! You've reached the final step and are now ready to harness the power of automated, personalized email communication.
Conclusion
By integrating SendGrid with Airtable, you can streamline your email automation and deliver personalized emails efficiently.
This combination allows you to harness the power of data-driven email campaigns, ensuring that your audience receives tailored and relevant messages. Whether you're sending out newsletters, promotions, or updates, this integration empowers you to connect with your recipients in a more personalized way.
If you encounter any challenges along the way or have questions, don't hesitate to reach out to us at hello@codelessapi.io.