Syncing Notion to PostgreSQL with CodelessAPI
Published on August 14, 2023
Introduction
Streamlining your data management workflow by syncing data from Notion to a PostgreSQL database is made easy with CodelessAPI.io. This guide provides a step-by-step walkthrough of the process, allowing you to efficiently transfer data without the need for complex coding. Discover how CodelessAPI.io can help you manage and sync your data seamlessly.
Syncing Made Simple
Follow these simple steps to set up data synchronization from Notion to PostgreSQL using CodelessAPI.io:
Step 1: Sign Up and Create a New API
- Create a CodelessAPI.io account: If you're not already a user, sign up for a free CodelessAPI.io account by visiting the sign-up page.
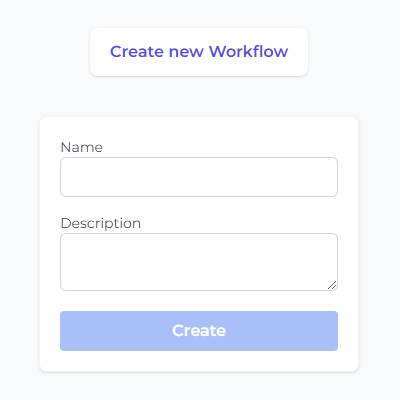
- Generate a new API: Log in to your account and navigate to the "Workflows" page. Click the "+ Create new Workflow" button. Provide a descriptive name and relevant description for your API. Once created, you'll be taken to the API builder interface.
Step 2: Connect Notion as the Source
- Select Notion as the data source: In the "Data" section of the left sidebar, expand the "Read" options, and choose "Notion" as the source for your synchronization.
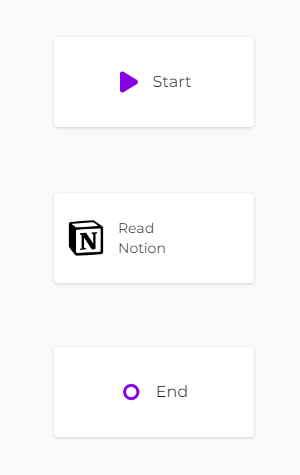
- Add the Notion module to the canvas: Drag and drop the "Notion" module onto the canvas. This module will be your starting point for reading data from Notion.
Step 3: Configure the Notion Data Source
- Authorize CodelessAPI with Notion: Click on the Notion module within the canvas and select "Configure". This will open up a configuraiton panel on the right. Select the "Add Notion Account" button. This will open a new window where you can choose which Notion databases you want CodelessAPI to access. Follow the prompts to authorize the relevant databases.
- Select the database and properties: After authorization, return to the builder page. Click on the Notion module and choose "Configure". Select the specific Notion account and database you want to sync data from. Then select the database you wish to retrieve data from in the synchronization process.
- Select columns: Choose the columns you want to include in the synchronization process.

Step 4: Connect PostgreSQL as the Destination
- Choose PostgreSQL as the destination: In the "Data" section, expand the "Create" options, and select "PostgreSQL" as the destination for your synchronization.
- Add the PostgreSQL module to the canvas: Drag and drop the "PostgreSQL" module onto the canvas. This module will be where the synchronized data will be inserted into your PostgreSQL database.
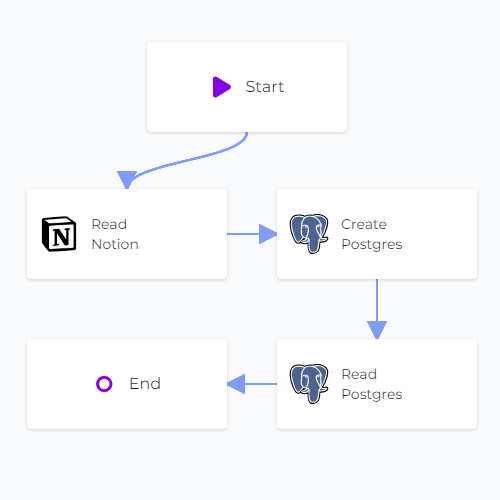
Step 5: Link the Modules
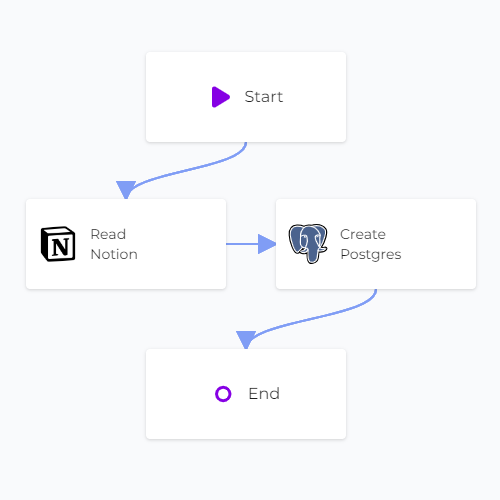
Establish a data flow from the Notion module to the PostgreSQL module by linking them in the desired sequence. Connect the "Start" module to the "Notion" module, and then link the "Notion" module to the "PostgreSQL" module. Finally, connect the "PostgreSQL" module to the "End" module. To link modules, click on each module, then select "Link", and choose the module you want to link to.
Step 6: Map Data in PostgreSQL
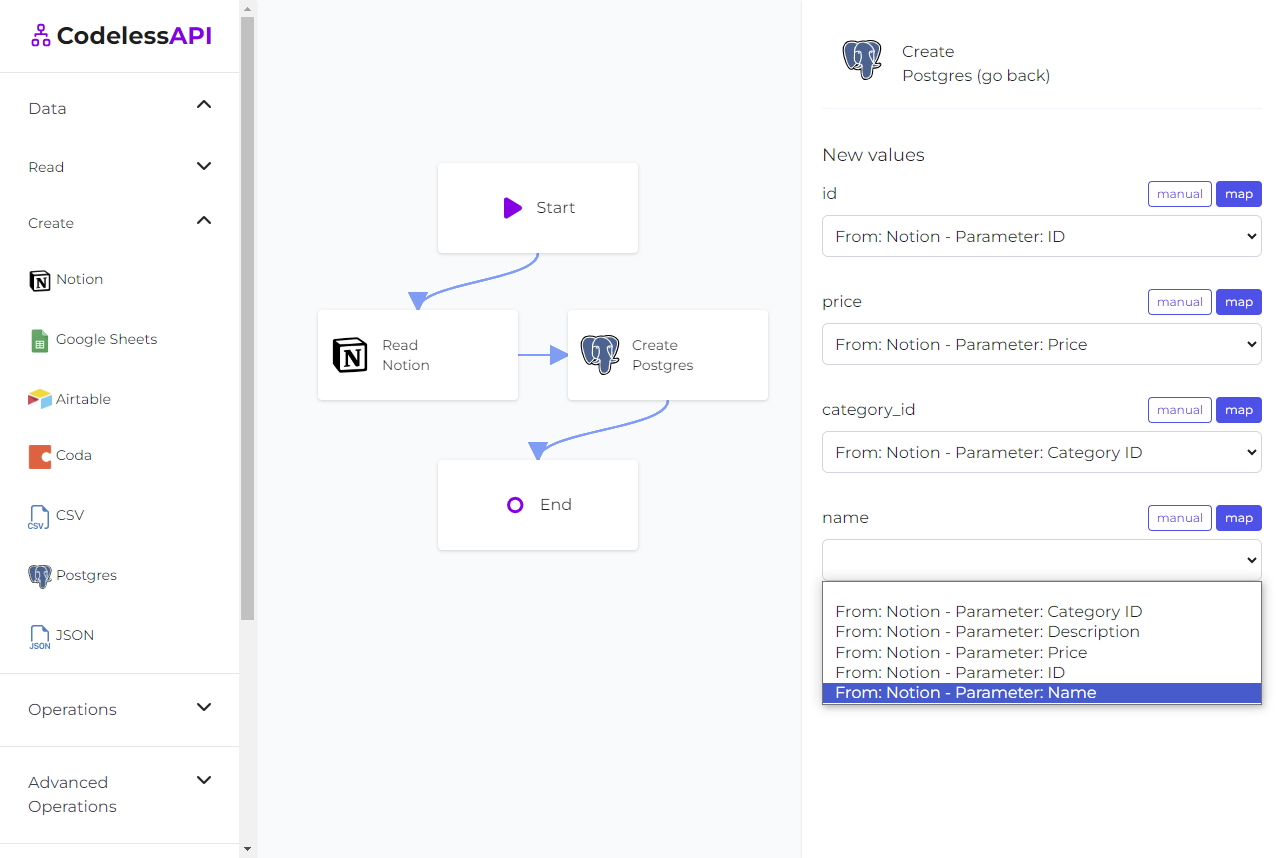
- Authorize CodelessAPI.io with PostgreSQL: Click on the "PostgreSQL" module within the canvas and select "Configure". Follow the prompts to authorize CodelessAPI.io and provide your PostgreSQL database credentials, including the host, port, database name, username, and password.
- Select the target table: After authorization, choose the specific table in your PostgreSQL database where you want to insert the synchronized data.
- Map columns in PostgreSQL: Utilize the "map" feature to link the corresponding Notion columns to the relevant columns in your PostgreSQL table. This ensures accurate and organized data insertion.
- Verify synchronized data in PostgreSQL: To confirm the successful synchronization of data from Notion to PostgreSQL, use the "Read" module for PostgreSQL. Configure the module to read from the same table and columns you selected earlier for data synchronization. This allows you to view the newly synchronized data in your PostgreSQL database.
Step 7: Test and Deploy Your API
- Test your API: Initiate a test run of the API using the "Run" button. This helps identify potential issues and validates the API endpoint's functionality.
- Deploy and use your API: After configuring the API, access the generated API endpoint to start the synchronization process between Notion and PostgreSQL. To use the API, click on the "Start" module and select "Configuration" to obtain the API link.
Conclusion
CodelessAPI.io simplifies the process of syncing data from Notion to a PostgreSQL database, eliminating the need for complex coding. With its intuitive interface and powerful features, you can enhance your data management workflow across various platforms. Whether you're updating records, managing databases, or automating data transfers, CodelessAPI.io streamlines your data synchronization tasks.
Ready to optimize your data synchronization process? Explore the capabilities of CodelessAPI.io today. For questions or feedback, feel free to reach out to us at hello@codelessapi.io. Our team is dedicated to assisting you in improving your data management activities.