CodelessAPI.io: Adding Data to Coda Made Easy
Published on August 20, 2023
Introduction
Simplifying the process of adding data to your Coda tables can greatly improve your data management efficiency. However, for non-technical users, setting up complex APIs to handle data integration can be challenging. Enter CodelessAPI.io – a revolutionary platform that allows you to seamlessly add data to Coda without writing any code.
In this blog post, we'll guide you through the step-by-step process of using CodelessAPI.io to integrate Coda and create powerful APIs, enabling you to effortlessly add data to your Coda tables with ease.
Building Your Coda API
Here's a step-by-step guide on how to create your API for adding data to Coda using CodelessAPI.io:
Step 1: Sign Up and Create a New API
- Signing up: If you don't have a CodelessAPI.io account, you can sign up for free here.
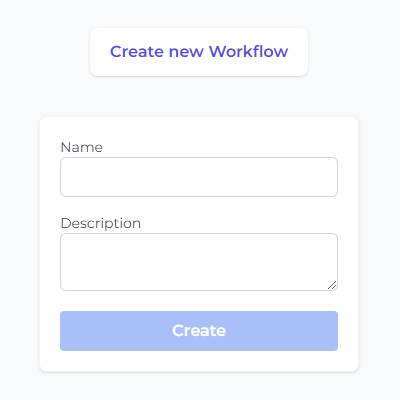
- Create a new API: After logging in, navigate to your dashboard and click on "Create new Workflow". Provide a name and description for your API to reflect its purpose.
Step 2: Adding the Coda Module
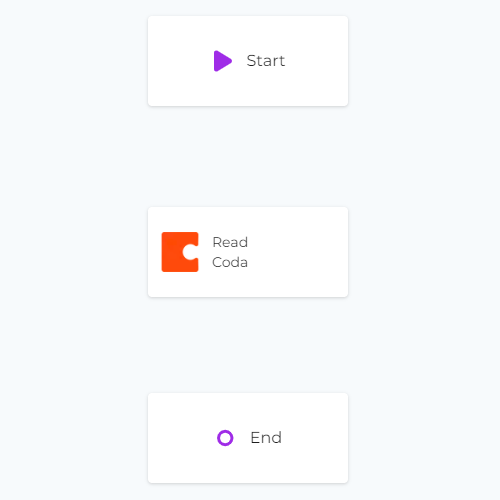
- Select your data source: Click and expand the "Data" section on the left sidebar. Choose "Coda" from the options available.
- Add it to the canvas: Drag and drop the "Coda" module from the left panel onto the main canvas to begin building your API.
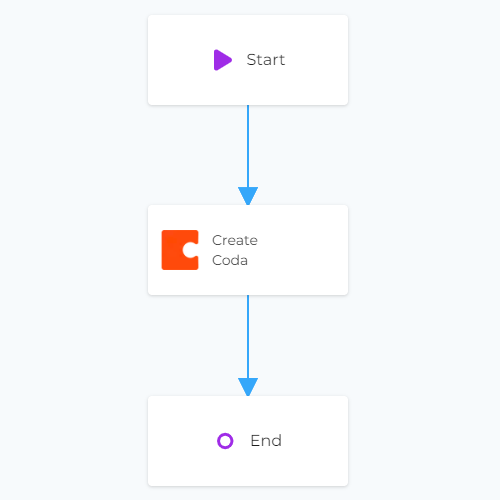
Step 3: Link Modules
Make sure you have linked all your modules together by clicking each module, then clicking link and linking it to the next module. This signifies in what order the API should be executed. For this tutorial, your linked modules should look something like this.
Step 4: Configuring the Coda Data Source
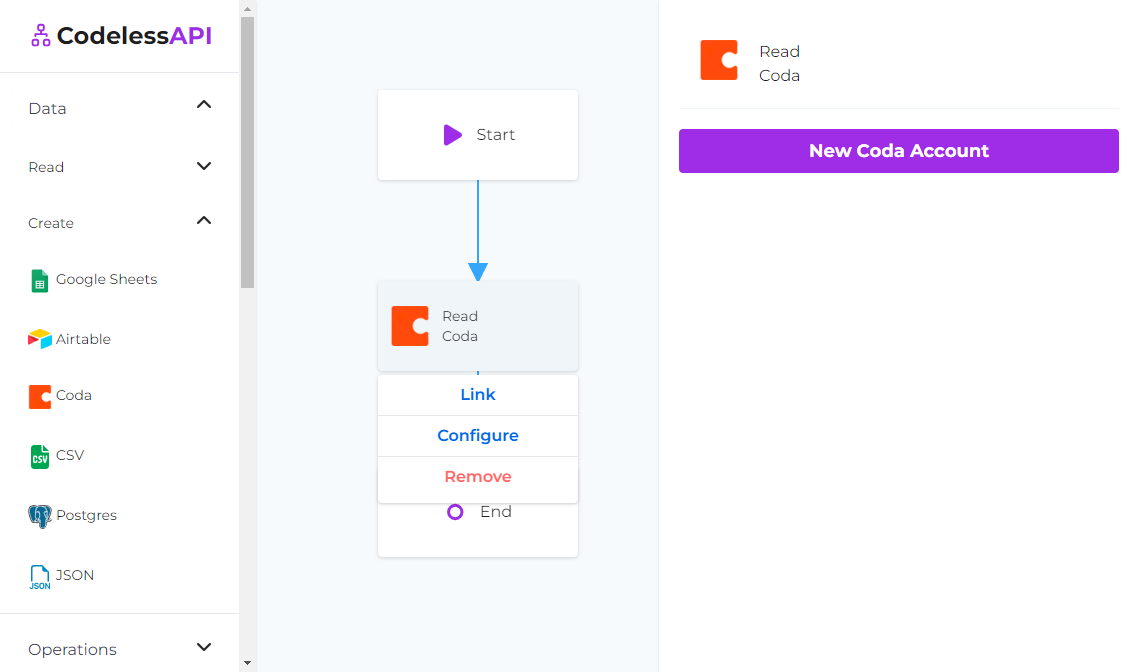
- Click on the Coda module on the canvas, and then select "Configure" from the options.
- In the configuration panel, click on the "New Coda Account" button and paste your Coda API token. Optionally, provide a name and description for the account. To get your Coda API token, you'll first need to generate an API token from your Coda account settings. You can do this by logging in to your Coda account, then going to account settings and clicking on "Generate API Token".
- Once authorized, select the Coda document and table where you want to add new data.
- Map the fields in your Coda table with the data you want to add. You can use hardcoded values or dynamic values that you can receive through API requests.
Step 5: Customizing Data Addition
CodelessAPI.io allows you to add data to Coda using either hardcoded or dynamic values:
- Hardcoded values:
- Data input: Within your Coda configuration, select "manual" for the columns where you would like to provide hardcoded values. Then enter the values within the input box provided.

- Data input: Within your Coda configuration, select "manual" for the columns where you would like to provide hardcoded values. Then enter the values within the input box provided.
- Dynamic values:
- Start Module: To add parameters to accept via POST requests to your API, click the "Start" module on your canvas, then click "Configure".
- Update API Post Values: Click the "POST" option and add the parameters that your API should accept in the body of its POST request.

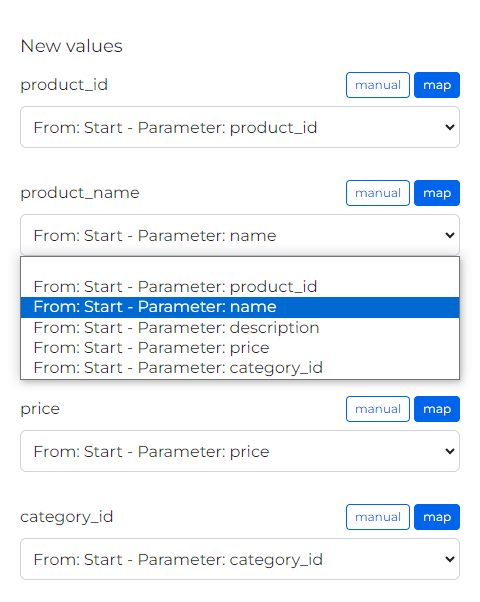
- Update API Post Mappings: Go back to your Source module's configuration and select "map" for the columns that will accept values from the body of your POST request (the values added in the Start module). Choose the corresponding POST call fields from the dropdown to map the values.
Step 6: Testing and Deploying Your API
- Test your API: On the left sidebar, fill out the POST values and click the "Run" button. This will trigger the built-in testing feature to validate your API endpoint and verify the API response.
- Deploy and utilize your API: With your newly created API, you can access your API endpoint by clicking on the "Start" module and then clicking on the "Configuration" option. Test your POST API using the curl command, Postman, or any other tool and pass in the body as JSON as shown in the example.
Conclusion
CodelessAPI.io empowers you to add data to your Coda tables with ease, even if you have little to no coding experience. By using the intuitive drag-and-drop interface, combined with the power of Coda, you can create dynamic APIs without writing any code. Whether you're a business analyst, a developer, or a non-technical user, you can now streamline your workflow and enhance your data management processes with CodelessAPI.io.
Start leveraging the potential of Coda data today by trying out CodelessAPI.io. If you have any questions or feedback, feel free to reach out to hello@codelessapi.io. We're always here to help!